Teaching First Graders to Tell Time: A Simple Guide That Actually Works
Discover the simple 'minute hand at 12' secret that makes teaching first graders to tell time surprisingly easy. Practical tips, common mistake fixes, and interactive lessons that work.
Why Analog Clocks Still Matter for First Graders
In a world dominated by smartphones and digital screens, you might wonder: does my child really need to learn how to read an analog clock? The answer is a resounding yes.
Teaching first graders to tell time on analog clocks builds essential skills that go far beyond simply knowing the hour. Analog clocks help children understand the passage of time visually. When your child watches the minute hand slowly move around the clock face, they develop an intuitive sense of how long five minutes, fifteen minutes, or an hour actually feels. This spatial understanding of time is something digital displays simply cannot provide.
Moreover, analog clocks are everywhere. Schools, libraries, doctor's offices, train stations, and many public spaces still rely on traditional clocks. Your child will encounter them throughout their life, and being unable to read them can lead to confusion and missed appointments.
The good news? First grade is the perfect time to introduce this skill. At ages 6-7, children have developed the number recognition and fine motor observation skills needed to distinguish between clock hands. And with the right approach, teaching time to the hour can be surprisingly straightforward.
What Are the Hour and Minute Hands on a Clock?
Before your child can tell time, they need to master one fundamental concept: understanding the two hands on a clock face. This is where many children get confused, but a simple visual trick makes it click.
The Short Hand (Hour Hand) The hour hand is the shorter, stubbier hand on the clock. Think of it as the "lazy" hand because it moves very slowly. It takes a full 12 hours to make one complete trip around the clock! When teaching your child, you might say: "The short hand tells us the hour. It's short because 'hour' is a short word."
The Long Hand (Minute Hand) The minute hand is the longer, skinnier hand. It's the "busy" hand because it moves much faster, completing a full circle every 60 minutes. You can explain: "The long hand tells us the minutes. It's long because it has more work to do!"
A Memory Trick That Works Here's a trick that helps first graders remember: "Short hand, short word (hour). Long hand, long word (minute)." Some parents also use color coding. If you have a teaching clock at home, consider coloring the hour hand red (for "stop and look") and the minute hand blue.
Once your child can confidently point to each hand and name it, they're ready for the next step: reading the time.
How Do You Teach Time to the Hour? The 'Minute Hand at 12' Secret
Here's the secret that makes telling time to the hour incredibly simple for first graders: when the long minute hand points straight up to 12, just look at the short hour hand.
That's it. That's the entire trick for reading "o'clock" times.
Let's break it down into teachable steps:
Step 1: Check the Minute Hand Position Ask your child: "Where is the long hand pointing?" If it's pointing straight up at the 12, you know it's an exact hour (o'clock time).
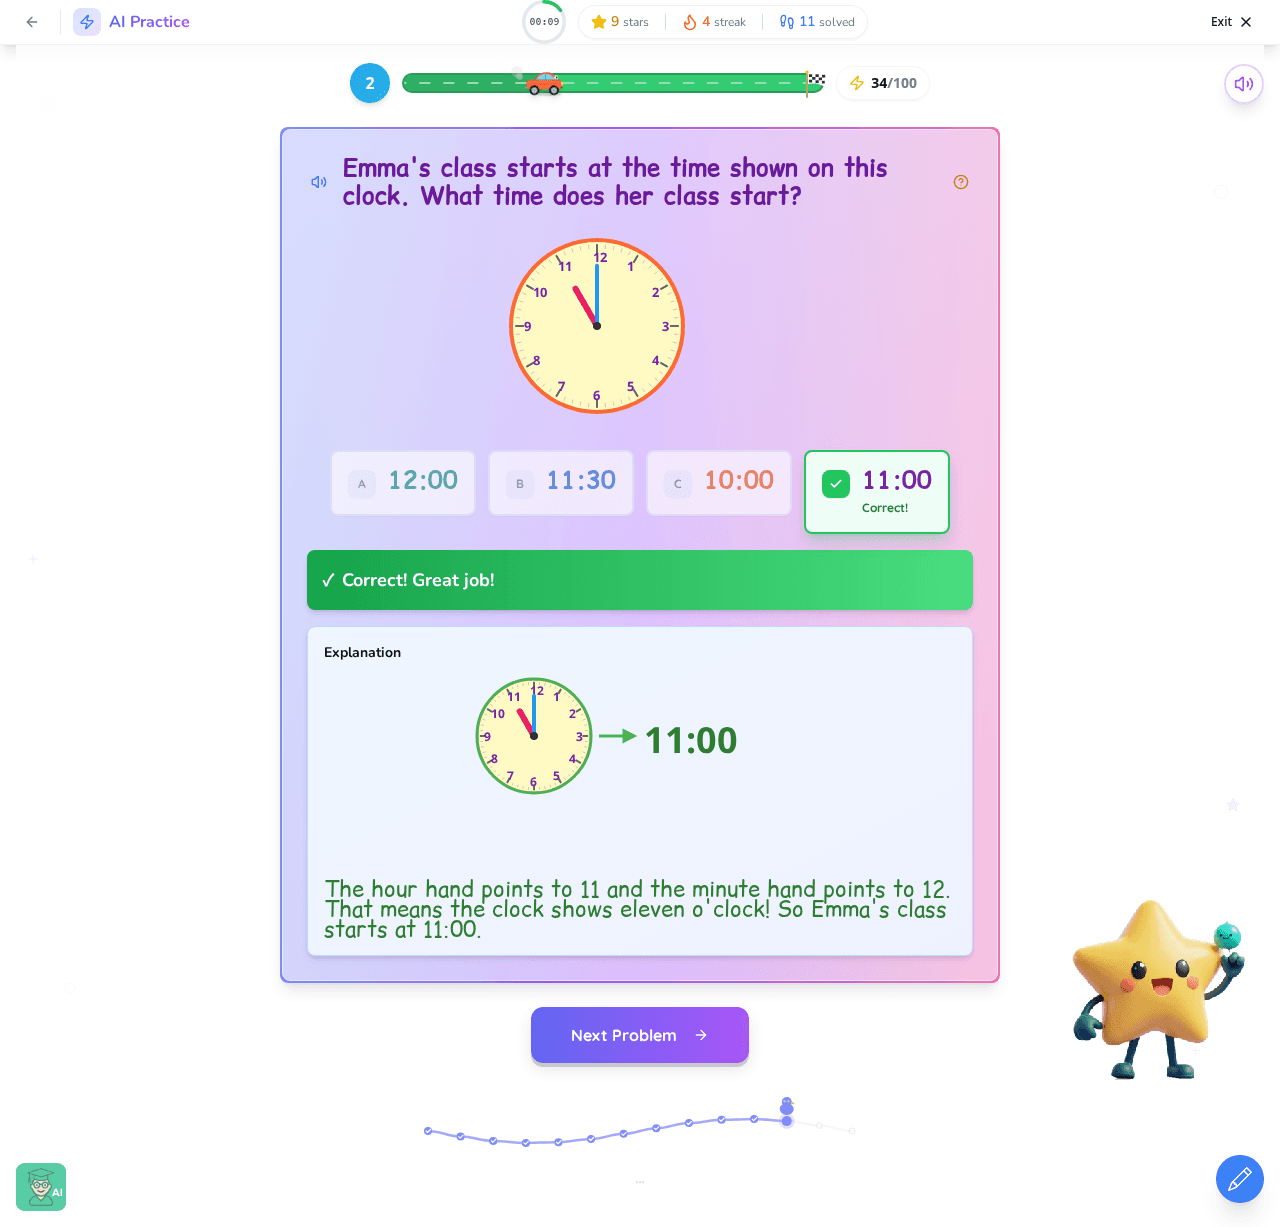
Step 2: Read the Hour Hand Now ask: "Where is the short hand pointing?" Whatever number the short hand points to, that's the hour. If the short hand points to 3, it's 3 o'clock. If it points to 7, it's 7 o'clock.
Step 3: Say It Out Loud Practice saying the time together: "The long hand is at 12 and the short hand is at 5, so it's 5 o'clock!"
Why This Works This method works because it gives children a clear decision rule. They don't need to understand all the complexities of time yet. They simply need to check one condition (minute hand at 12) and then read one number (where the hour hand points).
As one lesson on AI Teacherly explains to students: "Here's the secret! When the long hand points to twelve, we look at the short hand. The short hand shows the hour!" This simple framework builds confidence before introducing half hours and minutes.
Connecting Analog and Digital: Same Time, Different Display
Once your child can read analog clocks to the hour, it's time to connect that knowledge to digital clocks. This dual understanding is essential in today's world where both formats appear regularly.
The key insight for children is simple: analog and digital clocks show the same time, just in different ways.
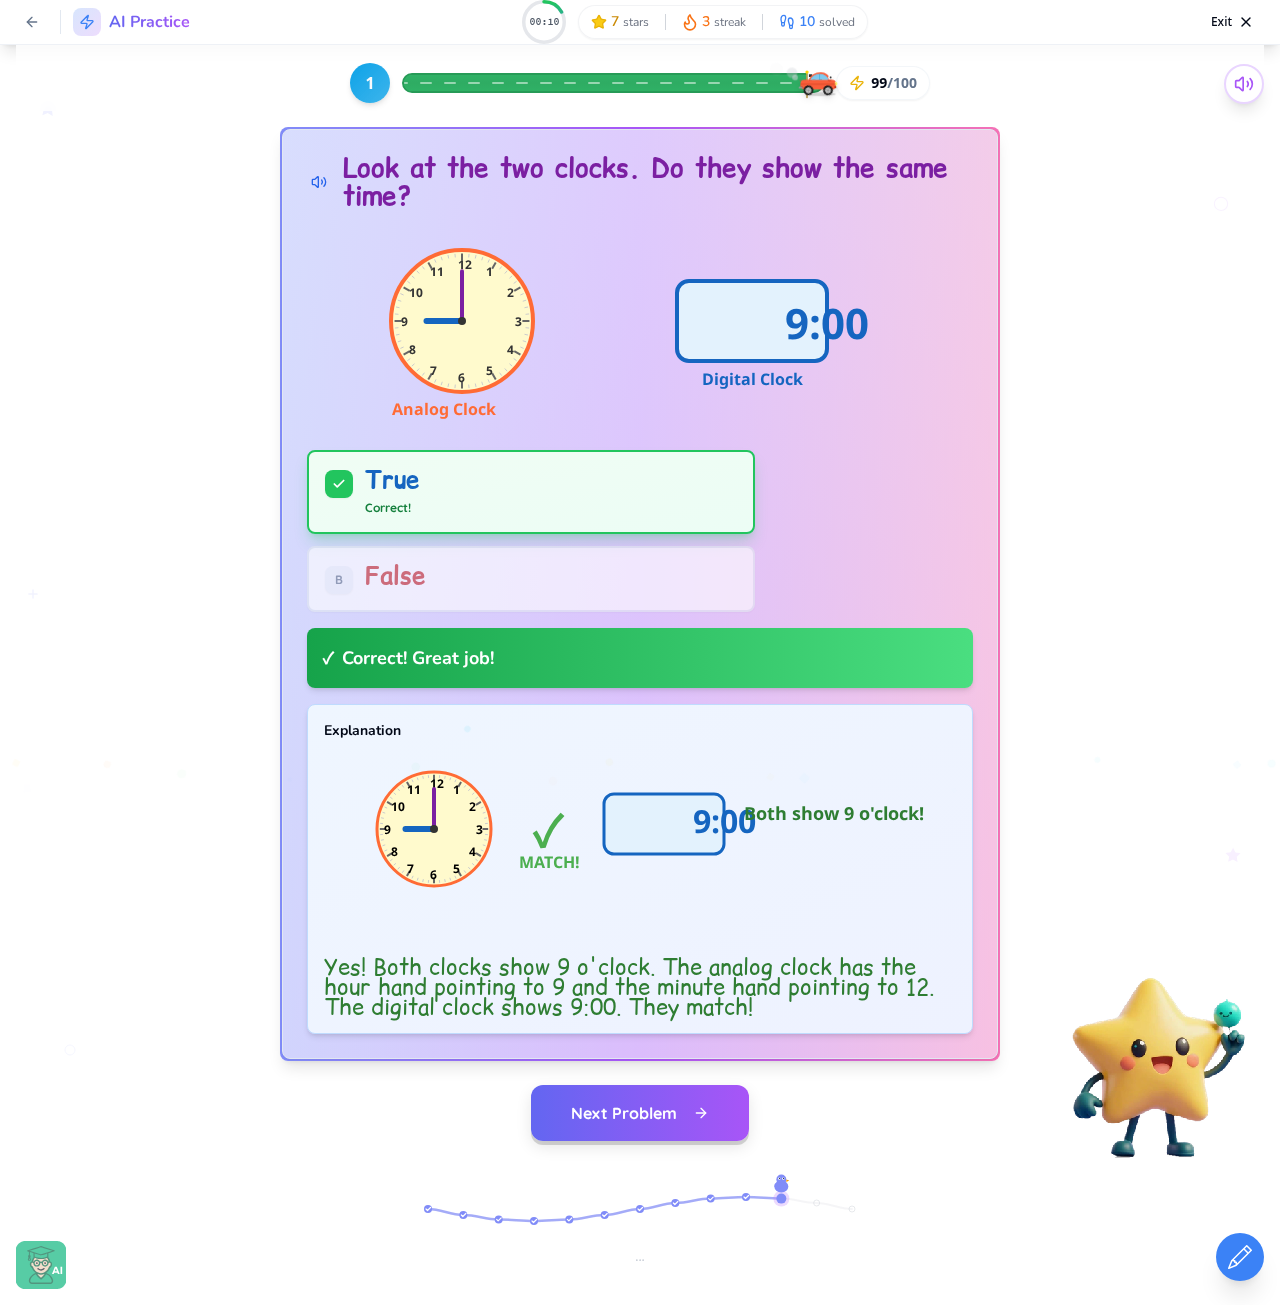
When an analog clock shows the short hand pointing to 3 and the long hand pointing to 12, we say "3 o'clock." A digital clock displays this same time as "3:00." The number before the colon is the hour, and "00" means zero extra minutes past the hour.
Here's how to teach this connection:
Start With Side-by-Side Comparisons Show your child both clock types displaying the same time. Point out that "3 o'clock" and "3:00" are simply two ways of writing the identical moment in time.
The interactive problem below shows exactly how this dual-format learning works in practice.
Practice the Translation
- Show an analog clock at 7 o'clock → Ask: "How would we write this on a digital clock?" (Answer: 7:00)
- Show a digital clock reading 9:00 → Ask: "Where would the hands be on a round clock?" (Answer: Short hand on 9, long hand on 12)
Real-World Reinforcement Point out both clock types in your home. Many microwaves, ovens, and phones show digital time, while wall clocks and watches may be analog. Ask your child to "translate" between formats during daily routines.
See How Interactive Time-Telling Lessons Work
Learning to tell time becomes much more engaging when children can practice interactively. Static worksheets have their place, but interactive lessons allow children to receive immediate feedback and build confidence through repetition.
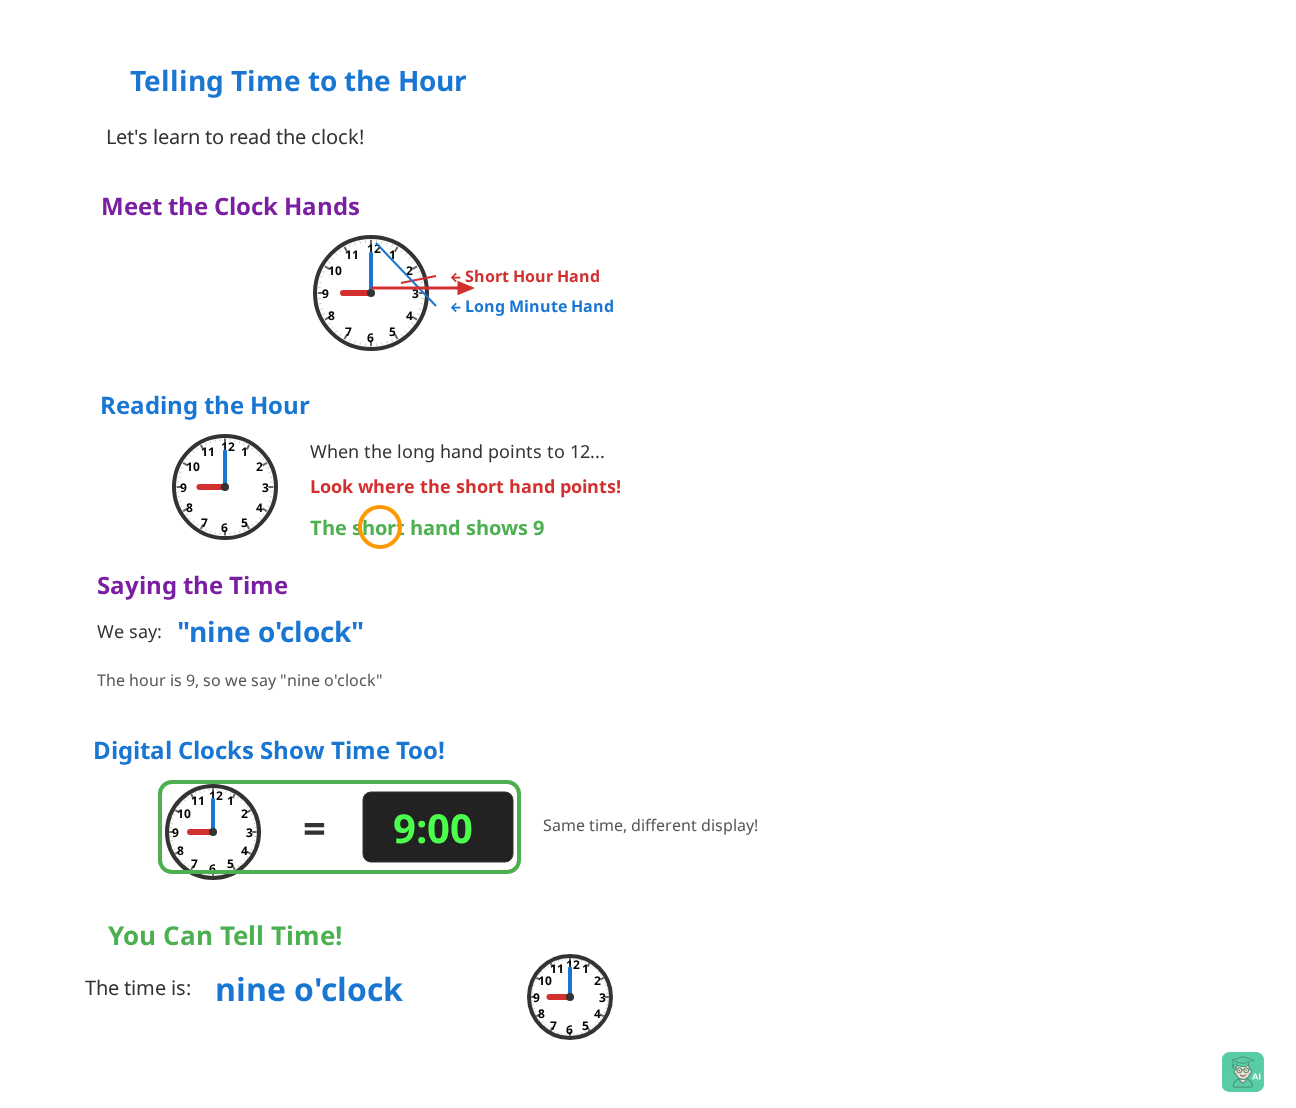
Here's what the full interactive lesson looks like on AI Teacherly:
The Telling Time to the Hour lesson for Grade 1 takes approximately 20 minutes and guides children through the entire learning journey. It starts by introducing the clock face and its components, then teaches children to identify the hour and minute hands using color cues (the short red hour hand versus the long blue minute hand).
What Makes Interactive Learning Effective
Unlike passive video watching, interactive lessons require active participation. Children must:
- Make choices: Selecting the correct clock that matches a given time
- Apply rules: Using the "minute hand at 12" secret to determine hours
- Receive feedback: Learning immediately whether their answer was correct
- Build fluency: Practicing multiple problems until the skill becomes automatic
The lesson progresses from simple identification ("Which hand is the hour hand?") to practical application ("What time does this clock show?") to real-world contexts ("Class starts at 9 o'clock. Which clock shows that time?").
Why Parents Love It For busy parents, these structured lessons take the guesswork out of teaching. You don't need to be a math teacher to support your child's learning. The lesson explains concepts in child-friendly language, provides plenty of practice, and tracks progress automatically.
Fun Ways to Practice Telling Time at Home
The best way to reinforce time-telling skills is through consistent, low-pressure practice woven into daily life. Here are practical activities that make learning feel like play:
1. The "What Time Is It?" Game Throughout the day, randomly ask your child to check the clock and tell you the time. Make it fun by timing activities: "Let's see what time it is when we start dinner... and what time it is when we finish!"
2. Create a Visual Schedule Draw or print analog clocks showing key times in your child's day: wake-up time (7:00), school start (8:00), lunch (12:00), bedtime (8:00). Place these around the house as visual anchors.
3. Play "Clock Detective" When you're out and about, challenge your child to spot analog clocks. In the library, at the mall, in restaurants. Each clock they find and read correctly earns a point.
4. Use a Teaching Clock Inexpensive teaching clocks with moveable hands let children physically manipulate time. You call out a time ("Show me 4 o'clock!") and they move the hands to match.
5. Storytime With Time When reading books together, incorporate time questions: "The bear woke up at 6 o'clock. Can you show me what that looks like on our clock?"
6. The Countdown Challenge Set a clock to the current time and ask: "In one hour, what time will it be?" This builds anticipation skills and helps children understand time progression.
Remember: short, frequent practice sessions (5-10 minutes) work better than long, intensive ones. Aim for daily exposure without pressure.
Common Mistakes First Graders Make (And How to Fix Them)
Even with great instruction, most children make predictable errors when learning to tell time. Knowing what to watch for helps you provide targeted support.
Mistake #1: Confusing the Two Hands This is the most common error. Children read the minute hand as the hour or vice versa.
Fix: Reinforce the "short/long" distinction consistently. Use a physical teaching clock and have your child point to each hand while naming it before reading any time. Consider adding color coding (red hour hand, blue minute hand) for extra visual support.
Mistake #2: Saying the Wrong Hour When Hands Are Close When the hour hand is between two numbers (like between 2 and 3), children often guess the wrong hour.
Fix: For o'clock times, this shouldn't happen because the hour hand will be pointing directly at a number. If your child makes this error, they may be looking at times that aren't exactly on the hour. Stick to o'clock times until those are mastered.
Mistake #3: Reading Counterclockwise Some children try to read the clock backward, confusing 9 o'clock with 3 o'clock.
Fix: Practice number order on the clock face. Point to each number starting from 12 and going around: "12, 1, 2, 3, 4, 5..." Emphasize that we always read clocks going "the same way the hands move."
Mistake #4: Forgetting the "O'clock" Rule Children sometimes try to read times when the minute hand isn't at 12, leading to confusion.
Fix: Remind them of the first step: "Always check where the long hand is first. If it's not pointing to 12, it's not an o'clock time." This gives them permission to say "I'm not sure" for more complex times they haven't learned yet.
Key Takeaways
- The 'minute hand at 12' rule is the simplest way to teach o'clock times: when the long hand points to 12, read where the short hand points
- Use the memory trick 'short hand, short word (hour)' to help children distinguish between clock hands
- Connect analog and digital clocks early by showing that 3 o'clock and 3:00 represent the same time
- Practice in short, frequent sessions (5-10 minutes daily) rather than long study blocks
- Watch for common mistakes like confusing the hands or reading counterclockwise, and address them with targeted practice
- Interactive lessons provide immediate feedback that builds confidence faster than worksheets alone
- Make time-telling practice part of daily routines rather than a separate 'lesson' activity
Frequently Asked Questions
At what age should my child be able to tell time to the hour?
Most children can learn to tell time to the hour by age 6-7 (first grade). This is when they have the number recognition skills needed. By age 8, children typically master half hours, and by age 9-10, they can read minutes.
Why is my child confusing the hour and minute hands?
This is the most common time-telling mistake. Children often need repeated practice distinguishing short from long. Try color-coding the hands, using memory tricks like 'short hand, short word (hour),' and having them point to each hand while naming it.
Should I teach analog or digital clocks first?
Start with analog clocks. They help children understand time as a visual, spatial concept. Once they master analog o'clock times, introduce digital as a 'translation' of the same information. Both formats are essential for daily life.
What's the easiest trick for teaching time to the hour?
The 'minute hand at 12' rule: When the long hand points straight up to 12, simply look at where the short hand is pointing. That number is the hour. This gives children a clear, simple decision rule to follow.
How long does it take for a first grader to learn to tell time?
With consistent practice, most first graders can master o'clock times in 2-4 weeks. The key is short daily practice (5-10 minutes) rather than long sessions. Interactive lessons and real-world practice speed up learning.
How can I practice telling time at home without worksheets?
Use everyday moments: ask your child to check the clock before meals, play 'clock detective' when out, create a visual schedule with analog clocks for daily routines, or use a teaching clock with moveable hands for hands-on practice.
Is learning analog clocks still important in the digital age?
Yes. Analog clocks appear in schools, public spaces, and many workplaces. More importantly, they help children visualize time passing, which builds better time management skills. This spatial understanding is something digital displays cannot provide.
Ready to make time-telling fun for your first grader? Try the interactive Telling Time to the Hour lesson free on AI Teacherly and watch your child master analog clocks with confidence!